4 Ways to Restore a Class Ring
Written by Annabelle
November 4, 2019

At Quick Jewelry Repairs, we get a lot of class ring repair jobs for sizing and polishing. A recent piece we received, however, was a little different than the rest- it had been very lovingly worn, to the point where it needed extensive work. Read on to learn how we did this particular class ring restoration.
Customer's Piece: Charles L. Coon School Ring
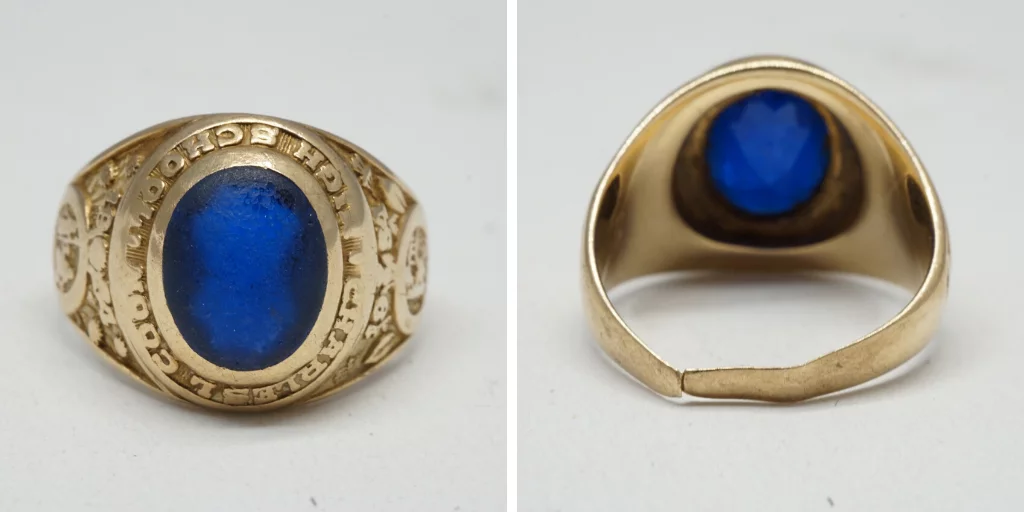
Our client reached out to us because she needed someone who could fix her 84 year old mother's class ring. The shank, or the band of the ring, was smashed in, the stone was grainy from years of abrasion, and the detailing was missing all of its enameling.

The class ring, before work.
From the pictures she provided, we could see that this ring needed a lot of work. We weren't initially sure if the shank needed a full replacement, or just a reconnecting solder job, so we told her to send it in and we would give it a thorough evaluation.
The Class Ring Restoration Process
1. Shank Replacement
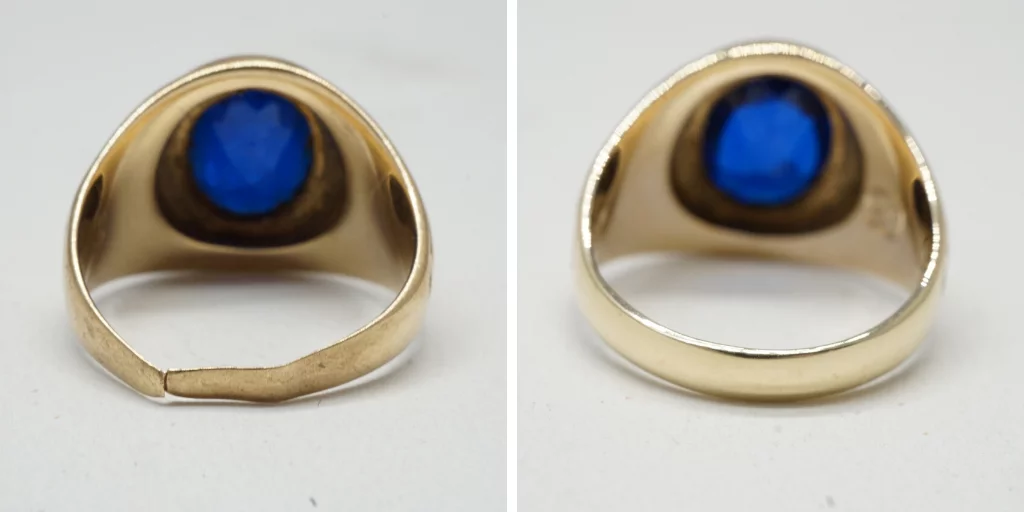
Once we received the ring, it was photographed for documentation and then passed over to our head jeweler. At one glance he determined that the existing shank was too thin after years of wear, which was probably the reason why it crumpled over time. The ring would need a half shank replacement.
After we notified our client and received her approval to proceed, our jeweler snipped off the existing back of the ring, and replaced it with a new, thicker and sturdier piece of metal. He then soldered both ends to the rest of the ring.
2. Stone Polishing
The stone, which was significantly worn down, was also finely polished to restore it to a shiny cabochon shape. Upon polishing, the stone revealed itself to be wonderfully faceted and cut underneath, showcasing its original deep royal blue color.
3. Engraving
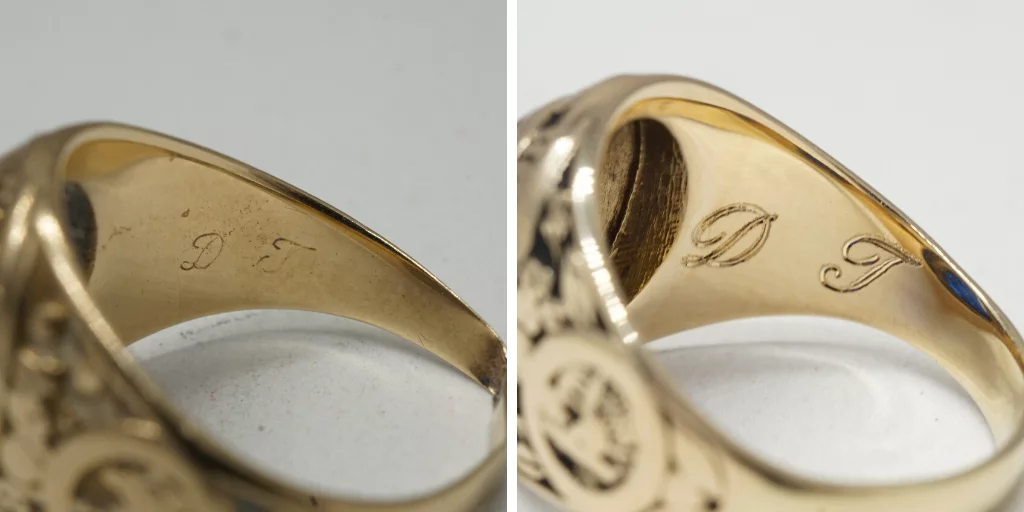
Halfway through the work, we noticed underneath the scratches and dirt that there was a partially worn down engraving on the side of the ring. We contacted the client, who asked us to remove the original engraving and re-engrave the piece with her mother's initials. Our jeweler buffed out the engraving with a burr and proceeded to laser etch the new engraving onto the side.
4. Enameling
Once all of the preliminary work was complete, it was time to move the ring into polishing and enameling- the finishing step in the class ring repair process. With a strong steel wool wheel, the polisher brought the ring to a high polish, and the enamel was applied to the detailing on the front and sides of the ring. The enamel settled into the grooves and the ring was “baked” in an oven to cure and harden the enamel.
The Finished Piece
The ring was removed from enameling, and photographed for her reference. It was remarkably different from when it first came in! The details now stood out in stark contract to the freshly polished gold, and the stone was beautiful and shiny. We packaged it up and shipped it back to our client after sending her some pictures, much to her delight.
Class ring restoration can take a lot of work, but the end result is clearly worth it! If you have a similar piece that needs some TLC, hit us up in the comments below.


Awesome work, my ring is missing the year enamel. Otherwise in pretty decent shape.
I lost my class ring in 1967 but found one exactly like it on Goodwill fines. I would need to change the initials on it and the center piece that is a C and needs to be changed to a B and the green metal filler whatever that is made of needs to be changed from blue to green. Can that be done? I can send you a picture of it.
This will depend on the ring’s construction, but either partial or complete replication with the correct letters and center stone will be no problem at all in principle. I’ve followed up directly via email to discuss next steps 😉
Can you provide a ballpark price for polishing a smooth stone and enamel restoration. Thanks
Hi Matt, Happy to help! We’ve reached out via email with further details.